
Shop Sheriff powers thousands of Shopify stores, from large household brands like Wonderchef and Durex, to more socially-focused Instagram famous brands like Ikonick and The Gold Gods, and all the way down to smaller individually-run shops just getting their feet wet with Shopify. Whichever type of shop you run, it's helpful to track AMP page performance to see how AMP impacts your SEO and site traffic.
To track AMP page performance, Shop Sheriff integrates with Google Analytics, Google Tag Manager, and Facebook Pixel.
The most common methods to track performance are using Google Analytics and Google Search Console. Here we will discuss both.
Setting up Tracking with Standard Google Analytics
- Simply enter your Google Analytics Property ID in the settings section of the AMP app.
- Add a referral exclusion for "cdn.ampproject.org" in your Google Analytics profile. We have a full tutorial on that here.
- To track AMP page views in Google Analytics, you can filter your pages by those with "a/s/" in the URL. By default, any AMP page will always has "a/s/" in the URL. If you're using a custom domain, then this filter may be different for you.
- You can also view events that we send to your Google Analytics account. Here are a few examples of events that we send:
Additionally, you can see all the analytics events that we send here.Event Type GA Event Action Page view Viewed {{page_type}}
(page_type may be one of "Product", "Collection", etc)Click add to cart Added Product Click link to full site Clicked Link to Full Page Submitted search Search - If you select "Add ShopSheriff/AMP UTM Parameters" from your Settings page, then AMP will add UTM Parameters to every link on your AMP pages. UTM parameters help you identify which AMP links are being clicked the most, and where your customers are coming from. The following is a list of the UTM parameters that we use:
UTM Property UTM Value utm_medium amp utm_source shopsheriff utm_campaign shopsheriff utm_content {{link_location}}
A short description about the link location. Examples include: "header-nav", "related-products", "collection-page"
The Checkout Process
When a user reaches your Cart page, they are always taken OFF of AMP, and proceed with the normal checkout flow. Therefore your normal tracking procedures will work as expected from the cart page onward.
Setting up Google Tag Manager with AMP
Using Google Tag Manager helps shops with more advanced analytics setups take advantage of their setup on AMP pages. We have a fantastic Blog post dedicated to this setup here.
Tracking Google Display Ads/AdWords
If you want to send Ads to AMP pages from Google Display Ads, you can manually enable this with the following method:
- Make sure you add your AdWords Conversion ID in the settings here.
- Make sure you turn OFF AMP UTM parameters (disabled by default) here.
- Follow Google's tutorial on how to send mobile visitors to AMP pages here.
AMP pages will then be able to be served from Google Ads for mobile visitors. When someone lands on the AMP page, they'll be able to be tracked via the normal Google Ads/Shopify tracking methods.
Using Google Search Console to track AMP performance
Aside from using Google Analytics, another great way to track AMP performance is by using Google Search Console. What shops typically find is that their SEO performance increases by using AMP, so that the average position of their search results improves.
Keep in mind, a lower position is better. A position of "1" means that your page often came up FIRST in Google search results.
The following steps can be used to track your search engine position increase from AMP pages:
- Navigate to your Google Search Console
- Click on "Performance" from the left hand column
- Click on "Position" at the top of the page, make sure it is highlighted in orange.
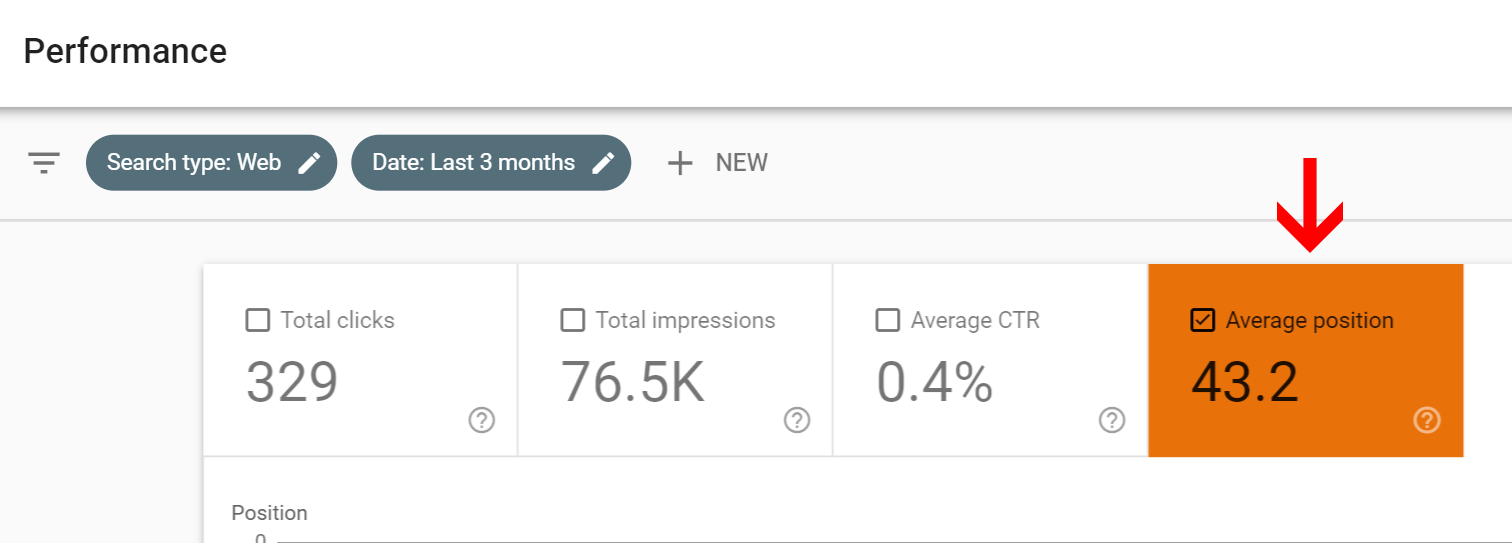
- Click on the "Search Appearance" tab within the table that pops up below.
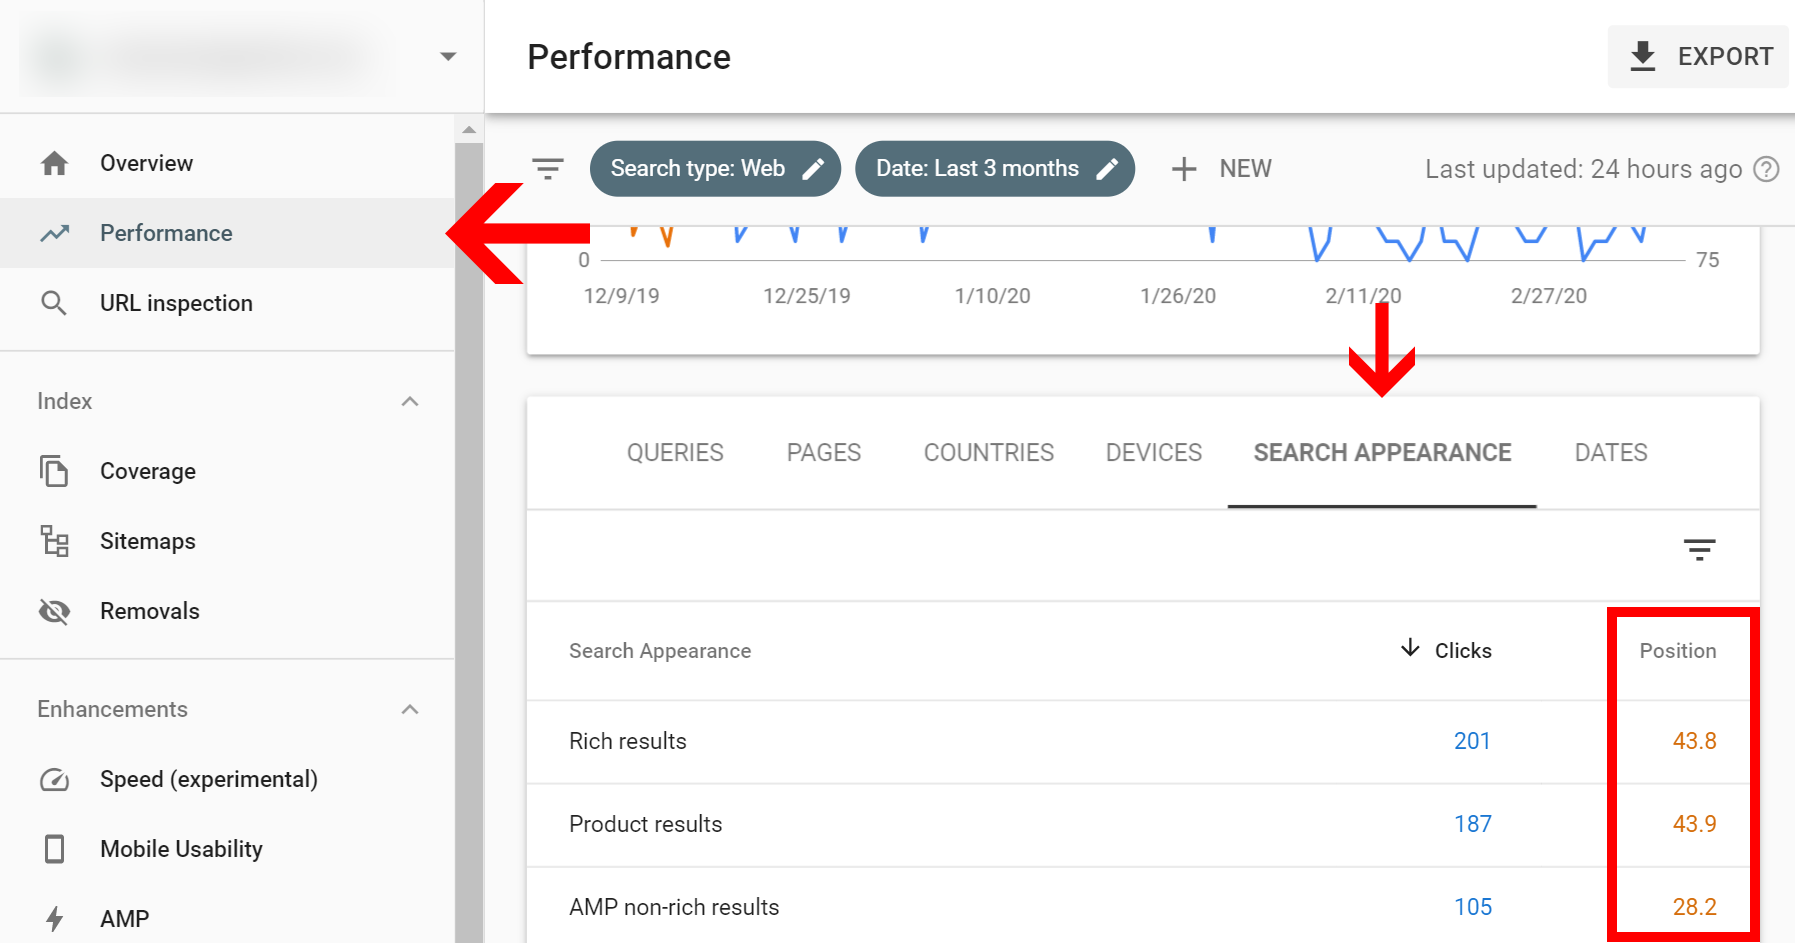
- Note the "Position" column on the right. Here you can view SEO position differences between AMP and non-AMP pages.
In the previous example, you'll see that "AMP non-rich results" showed up about 14 positions higher than other search results for the same shop. That boost is entirely due to AMP.
Using this "Performance" view, you can adjust results based on a single page, or all pages. You can track product performance, collection performance, and so on.
A note about this table: Don't be confused by the terms "Rich results" and "AMP non-rich results" -- the "non-rich" portion of this is referring to AMP pages that aren't Blog posts within the top "AMP stories" carousel. Your AMP pages are still fully capable of all the Schema and structured data that your non-AMP pages have.
Related reading: What are UTM parameters | AMP in the new Google Search Console